Tuesday, November 30, 2010

Completed table formwork..

So, after a race from 6:30am till 6:00pm today we have finally finished the table formwork. Our inspector has also approved our work and the concrete is coming tomorrow. So we're thrilled to be almost past this city of steel and concrete already. Tomorrow's schedule is as follows. The finisher mason comes at 6:30am, 8:00am the pumping guy Jordon comes from Island Wide Concrete Pumping and the concrete comes from Yamada at 8:30am. My friend Jim will be joining us to see what we've been up to as well.

This is #4 (1/2 inch) rebar every 8 inch's vertically and horizontally.


Steelwork and more video...

Here you can see the completed table top formwork. You can also see how we started laying down our rebar. We have 1/2 inch rebar (#4) every 8 inch's horizontally and vertically everywhere. By the original design we had more, it was 5/8 inch rebar (#5) every 8 inches which is way too much and expensive as well. Our engineer redesigned it with these new special 3/8 inch #6 rebar sections which add more strength then if we just had #5 throughout.

Monday, November 29, 2010

Cave sounds..

As the rain falls on our table top formwork (usually overnight), all morning long you can hear the drop of water into the tank bottom. They really sound like your in a cave. Its dark, confined space with these water sounds. I feel like I am in a nice Slovakian cave.

Table formwork.. DONE!

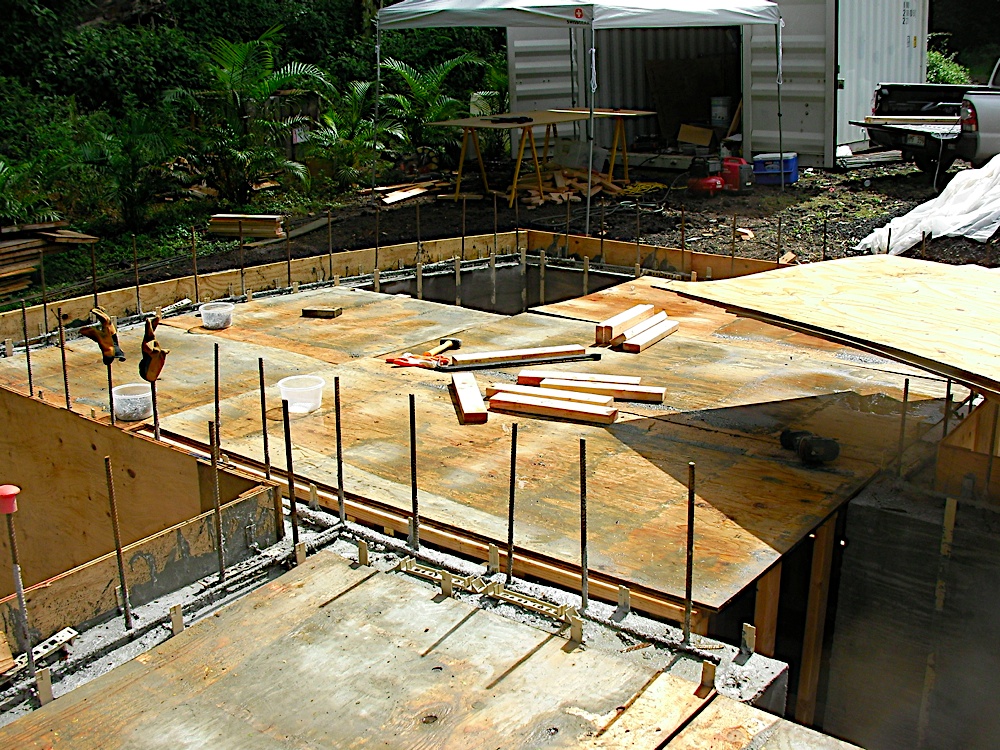
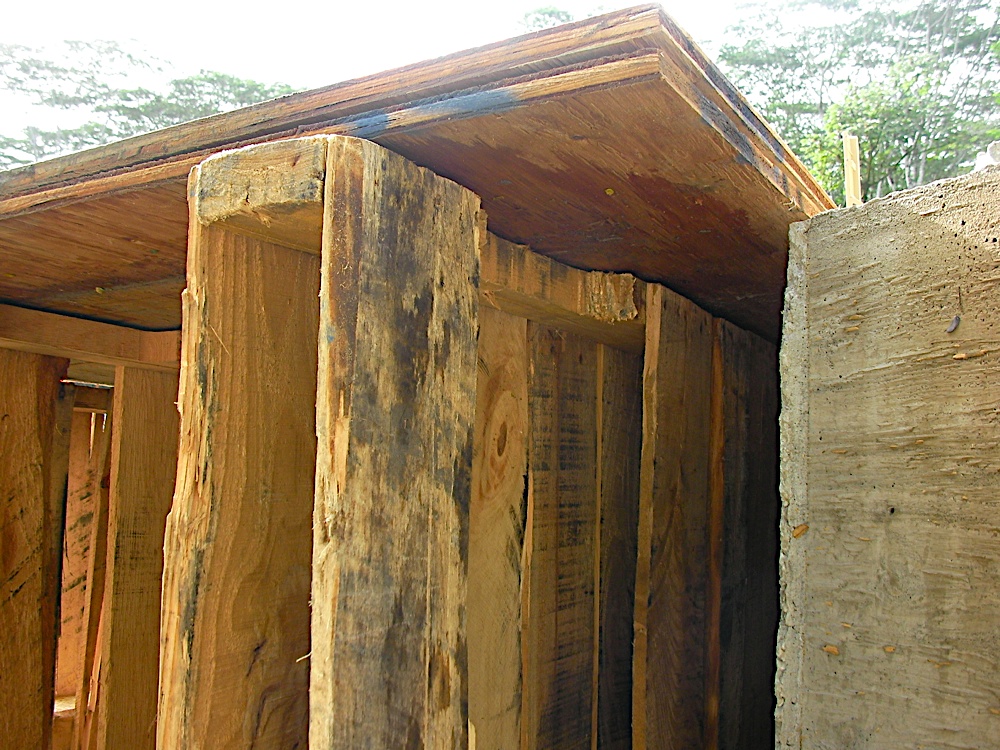
So we're happy that we have completed the table formwork finally. We rather thrilled to not have to work standing in water anymore and confined spaces. Taking out all the wood will be exciting, however that doesn't need to happen for at least two weeks after the concrete pour. Also it can be done in stages since there is no particular rush.

By the afternoon we had moved onto to spreading our steel on top of the formwork. This is a much simpler task then the bottom section of the house with the wire mesh. That whole part of the project would seem to have been the most daunting task thus far.

We lay down the 20 foot sections of #4 (1/2 inch / 12.7mm) rebar. We then trim them off at the ends. The cut off's will be used to make special bends which will attach to all those upright pieces of steel you see. We will bend those down with a pipe tomorrow. Also you can see from the drawings we have some sections with larger bars. These are essentially bridges, what our engineer calls a "two way slab". This is a better design then what we had before which was only thicker steel throughout but no supporting sections like this. Our engineer specified certain large open sections to have these stronger beams inside. This will help carry loads to the walls in the middle of the floor, etc. We have enough extra steel that we have added more then he specified across all big rooms now.

Bridge made out of a ladder and some base slab formwork.

We let the extra hang over and then we trim them to size using the hitachi bender/cutter right in place.


These rebars are bigger then they seem! They are 3/4 inch (19mm) #6 rebars.

These rebars are bigger then they seem! They are 3/4 inch (19mm) #6 rebars.


By the end of the day we had completed all the tabletop formwork as well as one layer of steel. Another layer will come on in the other direction.

Sunday, November 28, 2010

Math question.. SOLVED!

So, our good friend (Laci) took it upon himself to answer our math challenge. We're very grateful that you helped us solve this one. It took some googling however he found a good calculator online to solve this question. So according to him to empty the tank from a 92cm water level to about zero would take 2 hours 54 minutes. Our tank is actually higher, however the outflow pipe is below the top of the slab of course so from the pipe bottom (upper water level) is only 92cm.

Thanks again Laci for the numbers.

Our next challenge will be the time it takes to fill this tank based on average rainfall here.

Build'em straight and steady..

Here you can see here and the video how we were building, cutting and nailing our support walls together. The walls are mainly 8 feet long and 41 inch's heigh. The 2x4 section walls are 2 foot apart which is plenty support for our needs. Regular home construction calls for 16 inch on centre walls, but perhaps more weight is used there. Here we are estimating weight of concrete and steel to be 40kg per sq foot which isn't much considering when I stand on it I am at least 60kg to 65kg per square foot, so thats how we test the material.

We clamp several together, we found two was practical to work with. Then I nail from the top two nails in each stud wall. The clamps help to keep the piece steady at least on one side.


10 walls built and ready for use.


Cutting 4 pieces of 2x4 at once, this is a handy feature of this saw.

Building our cave..?

So we continued building our table top formwork today of course. I forgot to take out the camera again in the afternoon so I don't have the final pictures. But we are at least 95% covered already. The weather was pleasent and the rain didn't bother us much today, so thats always good news. We mainly ignore it at this point since it stops after 5 minutes usually. We used up all the 100 2x4's we bought yesterday by noon today and then used another 30 again or more today. We had to run into Hilo today to get more since we couldn't continue. Had we not needed this extra trip, we could have finished the top. Anyway, tomorrow we have maybe two hours to work with it then move on to the steel work. We need to figure out some things regarding a large hole we will leave so we can more easily remove the material. Eventually we will pour more cement and covered that section up to have only a 2 x 2 foot access hole.

We tried our best to use big sheets where could and not cut when not necessary. The most exciting part of this whole exercise will be to remove all this material after the concrete has cured. There isn't too much room to work inside, however we are small people which is a great advantage. Even now while building the walls its very helpful that its easier to move around down there.


Saturday, November 27, 2010

Making our support walls..

Here is a quick video showing how we cut and then make the support walls we are using for our table top formwork.


I fixed the video display problem so try again!

Wood tabletop...

Sadly I forgot to take a picture of our completed work this afternoon. We ran out of skids yesterday so we switched to 2x4's instead. We also ran out of those as well. So we took a break in the afternoon and went to our hot pound by the ocean. We are about 75% covered already on our tank floor. In the first picture you can see how we build the little walls. We cut the 2x4's ahead of time and then just nail the whole thing together quickly using my Bosch nail gun. Our walls are spaced 16 inch's on centre and the wall as you can see has supports ever 24 inch's (2 feet). Tomorrow we will likely finish the whole top tabletop formwork and then monday we hope to finish the steelwork as well. The inspector can come on tuesday and we can pour the concrete on wednesday. This is what we're aiming for. Early then wednesday would not be advisable since the concrete needs at least a week to cure to be able to hold the new weight we will put on top.

Build our supporting walls.

Extra support, however we will probably replace these with some long 2x4's instead.


Friday, November 26, 2010

Skid city...

So after our exciting trip back from Hilo with 23 skids we started building our skid supported table top forms. Since the skids a little short on height, we will double up the 5/8 plywood which will also add double the strength to the structure. What we did was use two skids on their sides (40 inch high), screwed a piece of 2x4 8 foot board to it to keep them level and straight. We used two 5/8 which makes 1 1/4 inch of material. Our engineer wanted us to use simpson 2x4 holders to support the material in between. They are expensive, at 74 cents a piece. We would need probably 50 pieces or more. Anyway, this way we don't need that kind of support as the material is plenty thick enough to hold up the concrete. The weight of concrete + rebar is about 40kg per sq foot, which is actually not very much. We use the walk on test. When I walk on it and stand, even on on foot and it supports me fine and doesn't bow, then we are good to go for concrete weight.

The most exciting thing will be taking all this out after its cured. Since the skids are disposable, I think we'll just cut them out with a skill saw.


The two plywood material stack on top of each other.

We do add support between the two skids as they are lined up.


So far this much has been completed.

Tower of skids...

As I mentioned my creative and innovative idea of using skids / pallets for holding up our formwork. I know everyone always wondered how many you can bring home on your 2010 Toyota Tacoma / Hilux pickup truck. Well, I would say safely at least 23 as you can see from the pictures. You can get an unlimited supply from freight forwarders here on the island or anywhere in the world. They make good firewood and other practical uses.


Thursday, November 25, 2010

Math question..

Please post your result in the comments section if you figure it out so I can add it to this website. Based on the following information, see if someone out there can calculate the result:


My tank is 70.141 sq meters. The water level in the tank will be 1.067 meters. My drain is located in one corner at the 1.067 meter depth. The inside diameter of the pipe is 5.08 cm. The drain pipe is exactly 20cm long. My tank volume is 74.827 cubic meters based on the numbers I have given.


If your up to the challenge then calculate using my final drain pipe location which would be 15m long and would have a slope to its exit point 2 meters below the tank height.


How long would it take to drain this tank if it was totally full? (convert the numbers to imperial using google if you need that instead)

Building a table.. too tall to eat off..

So we building our table top formwork now. This is exactly 40 inches high, when you add the 5/8 inch plywood then we get the height we need. The first things we are using are the slab formwork forms. This yields some savings by covering about 200 sq feet.

I came up a very creative idea. The height of a skid is exactly the height we need. Very likely i can get an unlimited supply for free! This yields big savings in money and work. We can stand them up on their sides and magic. Problem solved.


Stripping video.. watch us strip!

Here you can see us stripping the foundation slab and the inside walls also. The pouring rain ins't as evident in the video as it should be. As you can see from the final part of the video I felt like I was under water in a submarine or sinking boat. The water which was sitting on top of the wall forms would start pouring out of the screw holes as I was unscrewing them. Looked a little funny actually as you can see.

Wednesday, November 24, 2010

Stripping in the rain..

Our good friend rain has returned again with a vengeance today. We have at least 1 1/2 inch or 3 cm of water in our tank. It would have been more if we didn't have the drain as you saw. We spent from about 8am till 2pm stripping the plywood from our slab forms finally and the inside walls as well. My bosch impactor drill got a serious workout today pulling out about 1600 screws in a couple of hours. It got so hot you needed a glove to handle it. Its held up very well thus far and I will inspect the brushes to see how much they have worn. Here you can see the pictures of the stripped walls and the result. The walls were still warm and will probably remain that way for three days like last time. This whole stripping thing felt like our good friend Linda. She spends over a month decorating her house for Christmas. Then it takes her only one day to box it all up for next year again. We splashed more water on it before we left in the afternoon and overnight it has been raining so that should be taking care of the concrete's needs.

Water standing in our tank the next day after the pour. With no rain for over a week it was good timing I guess.


First slab formwork stripped off.


You can see our cold pour here. Thankfully it turned out fine and shouldn't cause any issue.

Inside supporting wall stripped.

Closeup of spidertie produce imbedded in concrete.


The morning after there was water standing from all the rain overnight on top of our walls before we stripped one side of the walls.

Tuesday, November 23, 2010

Wall pour video..

Here is the video I managed to throw together before the work got hot and heavy. Our spiderties worked flawlessly without a single bow, break or issue. I'm thrilled with the product and has worked great so far.

Let it rise...

The concrete pour happened without any issue today. The truck arrived from Yamada at exactly 11am as scheduled and the whole show went on without a single hiccup. This is great news and everyone was much happier compared to what happened last time. My dad and I switched the vibration job back and fourth. It was a hell of tiring thing to pull the vibrator up and down. Its an awkward thing to manoeuvring and has some weight to it. Its also a loud machine as well. By the end of the vibration job the end was steaming from how hot it had become. Anyhow, we were plenty tired after doing that for two hours for sure.


Our overflow drain

Our tank floor drain pipe.


The upper slab pour will cover this rebar.